After you've scanned and uploaded all the items in the cycle count or full store inventory, it's time to Reconcile your inventory. Click the Reconcile icon in your completed Inventory event to move to the Reconcile screen.

Next, select the Category that you have scanned for. If you are doing a full store inventory, select all categories.

To learn more about the reconcile screen, head to the Analyze Scan Results and Reconcile article first, as it will help you learn to drill down and filter to more manageable selections.
[Barcode] SKU/UPC Not Found
Problem
The barcode scanned does not exist as a UPC or SKU in Ascend (e.g. a Part Number barcode was scanned) or the product record scanned was hidden.
Solution
Write down or export the list of SKU/UPC Not found and the Section number they were scanned in, you will need to investigate the product(s) further.
Navigate to Database Explorer > Products (either by backing out of the Reconcile screen or another computer in your store). Search for the SKU/UPC that was listed with the discrepancy. Be sure to check Hidden in the toolbar to display any hidden product records. Hidden products will display in red.
If the product record is hidden and should be hidden, you will want to relabel the product that is on the floor with the appropriate product label. If the product is not hidden, but the number scanned is associated with a Part Number, you will want to relabel the product on the floor.
After investigating the SKU/UPC Not found discrepancies, you can make updates to the section file from within the Inventory Event > Section Inventory Scans window. For more information about editing the section file check out Comparing Scan Results and scroll down to the section on editing.
Note
Always configure inventory scanners with Ascend's recommended settings - this ensures incompatible barcode labels are found as soon as they are scanned, making it easier to identify and re-label the product.
[#] Cross match SKU/UPC
Problem
There are [number] of products in your database that have a UPC matching the in-store SKU of another product. Ascend doesn't know if you scanned the one item's UPC or the other item's SKU.
Solution
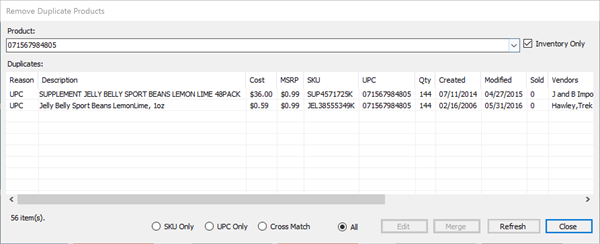
Double-click the scanned line, and resolve the discrepancy through the duplicate products utility.
Note
Best practice database maintenance in Ascend includes cleaning up your duplicate products. Make sure to run the Remove Duplicate Products utility regularly. Just navigate to Tools > Advanced Database Function > Remove Duplicate In store Products.

[#] Duplicate SKU/UPC
Problem
As with X Cross Match SKU/UPC this discrepancy has to do with cleaning up duplicate products in your database. This discrepancy refers to X number of products in your database that have the same UPC or in-store SKU as the product scanned.
To resolve this double click the scanned line and resolve the discrepancy through the duplicate products utility.
Solution
To resolve this double click the scanned line and resolve the discrepancy through the duplicate products utility.
Note
Best practice database maintenance in Ascend includes cleaning up your duplicate products. Make sure to run the Remove Duplicate Products utility regularly. Just navigate to Tools > Advanced Database Function > Remove Duplicate In store Products.
Non-Inventory
Problem
A non-inventory item (like a Labor SKU) was scanned.
Solution
If the product's quantity should be tracked you need to go into the product record and uncheck the non-inventory box.
Otherwise, right click on the product and select remove. Please note that this does not remove the product from the database, just from your current reconcile screen.
Not in selected Category
Problem
You've scanned a product outside of the Category you told Ascend you were scanning. Perhaps you were going through and really got into your cycle count... then scanned a lock while scanning your computers.
Solution
Just right-click the Product and select remove if it is not part of that category.
If the item you scanned should be in the Category you scanned, but was categorized incorrectly, simply double-click the Product and move into the appropriate Category to resolve.
Cost equals $0.00
Problem
The Product does not have cost configured. This is especially important to resolve prior to reconciling in order to avoid your average cost for the Product staying at zero!
Solution
Double-click the Product and enter a cost into the estimated cost field. If the product actually does not have a cost, then leave the cost at zero.
Unfortunately, this won’t work if you have an Average Cost of zero; you will have to manually Recalculate the Average Cost for a product.
Note
The best way to avoid running into this situation is by making sure to import the Cost column when adding new vendor product spreadsheets into your database, or including cost when you create a new individual product. Additionally, it is essential to verify cost before receiving products, as receiving at zero cost is not ideal.
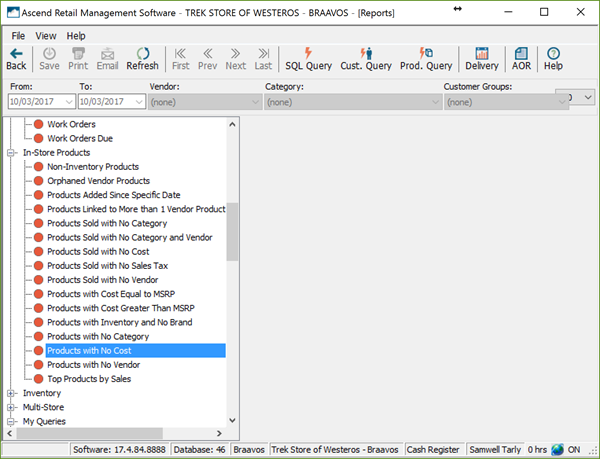
Otherwise, make sure to regularly check the Products with No Cost report under Reports > In-Store Products. Note: This report will show all products in your database with no cost, you only need to be concerned with items that you currently have in inventory by sorting the quantity column.

Cost greater than MSRP
Problem
You have a Product in your database where the MSRP is configured as less than its Cost. If reconciled as is, the product would reflect a negative margin - not cool.
Remember that the reconcile feature pulls in items you did not scan and your negative inventory. Once you reconcile, it takes care of all of those products - that's why it's important to pay attention to all discrepancies.
Solution
To resolve this one, you can double-click the product and enter an MSRP greater than the cost.
This one also won’t work if you have an Average Cost of zero, and you will have to manually re-calculate the Average Cost.
Note
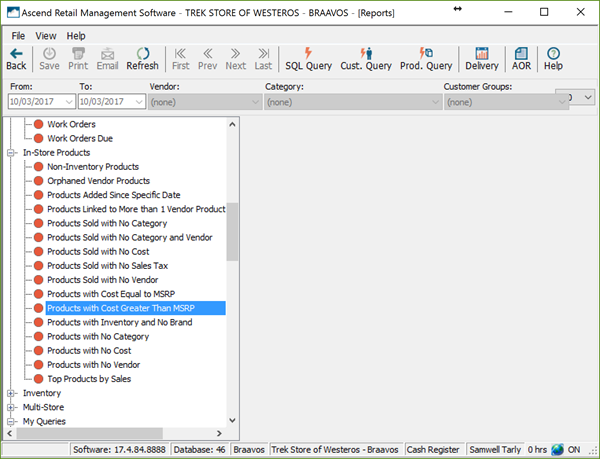
Best practice database maintenance in Ascend includes running the Products with Cost Greater than MSRP report regularly. this report can be found in Reports under In-Store Products.

Not Scanned
This discrepancy is a bit different than the rest. You'll want to make sure you're going to stay in the reconcile screen before starting to work on these items.
Problem
This flag refers to Products that have a positive Quantity On Hand in the database, but are not included in your scan file. This typically means that either you missed a few Products, or that these products are no longer in the shop.
Solution
To resolve this one, you need to investigate why the displayed Products, especially those of high value, were not scanned.
Did you forget about your back stock? Did someone forget to put that product on a Layaway? Was it not transferred? You need to take the time to figure this out before moving forward.
If you have a large list of Not Scanned products, you can print the list by clicking Preview in the top toolbar.
If the Product is in the store and not committed to a customer, you will single-click into the New Qty column and enter the correct quantity.
If the Product is a Special Order for a customer (including transfers requested from another multi-store location), verify the quantity column matches the sum of the special order not ordered and special order on order columns. Remember that the special order items are actual negative inventory and should stay at a negative quantity.
Be sure to check the Committed column - if an item displays a quantity in this column but does NOT have a matching Special Order value, these items probably just need to be marked as such on the transaction.
If the Product is no longer in inventory you will not need to do anything and the quantity on hand will update to zero upon reconcile.
Now, just click Analyze in the Reconcile screen and Ascend will update the products you made changes to.
Inventory Change
This discrepancy is also a bit different than the rest. You'll want to make sure you're going to stay in the reconcile screen before starting to work on these items.
Problem
This means there was a difference between what you scanned and what Ascend believes you should have in stock.
Solution
Just as it is important for you to look at items not scanned, it is equally important for you to look at the Products that will have an inventory change.
What if you double scanned an item? Or perhaps were entering a manual quantity for a bulk item like CO2 cartridges and accidentally entered 2500 instead of 250.
The old quantity column displays what your current Quantity On Hand is in Ascend. Upon reconciling, it will be replaced with whatever quantity is listed in the new quantity column. Take your time to look through these and verify all values.
Then, single-click into the new quantity column and change the Quantity to the correct quantity if needed.
Once you're done, click Analyze in the Reconcile screen and Ascend will update the product records you made changes to.
Additional Resources
KB22-116
