When a customer buys an item that needs to be assembled (e.g. a bike build), you’ll still want to create a work order to track your technicians’ workload.
Create the Work Order Detail at time of sale
Ideally, you want to create the Work Order at the time of sale for the bike.
You don’t want to end up with duplicate serial numbers for the customer, click Cancel on the Enter Serial Number prompt. Select the appropriate customer, then add the item to Work Order Details. Be sure to enter or select the serial number for the item when prompted. The Serial # fields do not populate yet – DO NOT select from or add to the Serial # fields yet.
Enter all other relevant information and click Save. On the Customer Repair Item prompt, click Cancel. It doesn’t show just yet, but the serialized item you added in Work Order Details is automatically selected as the repair item for the ticket.
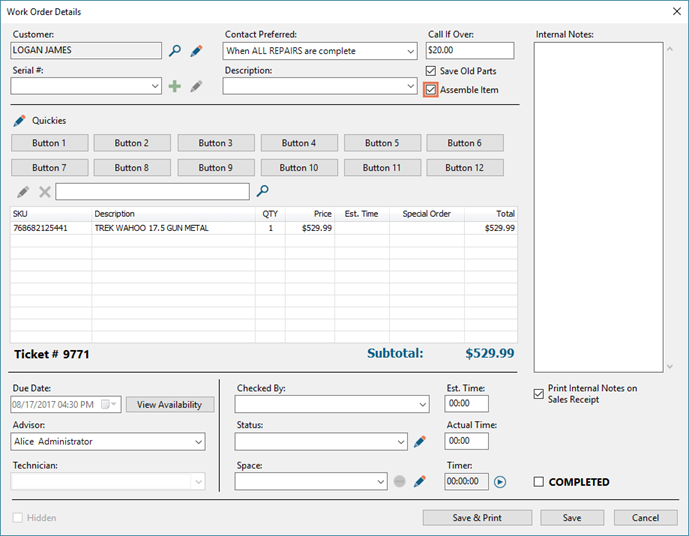
Take any necessary payments and save the transaction.
Create the Work Order Detail after the sale
Sometimes you end up selling the item on a normal transaction - maybe it's a Special Order or something else came up - and that's okay!
You can still create a Work Order for the assembly. If the original sale is closed when you create the Work Order, you can easily attach the bike in the Description or Serial No dropdown after you attach the customer to the Work Order Detail.
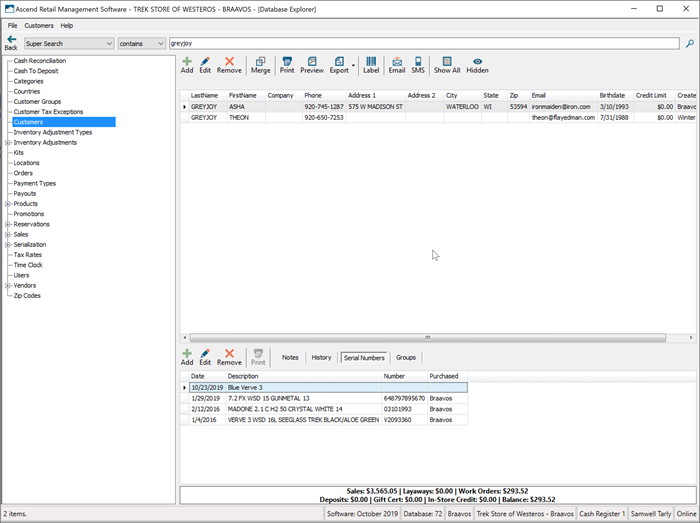
If the original transaction is still open as a Layaway, you won't be able to attach the bike to this Work Order yet. You can leave Serial No and Description empty or add a placeholder name (such as Blue Verve 3) for now.
Completing the assembly
From Work Order Details, make note of the item’s Serial Number.
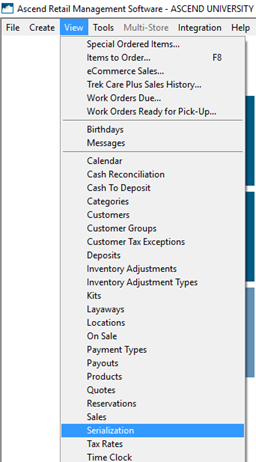
From the Ascend Desktop, select the View menu > Serialization.
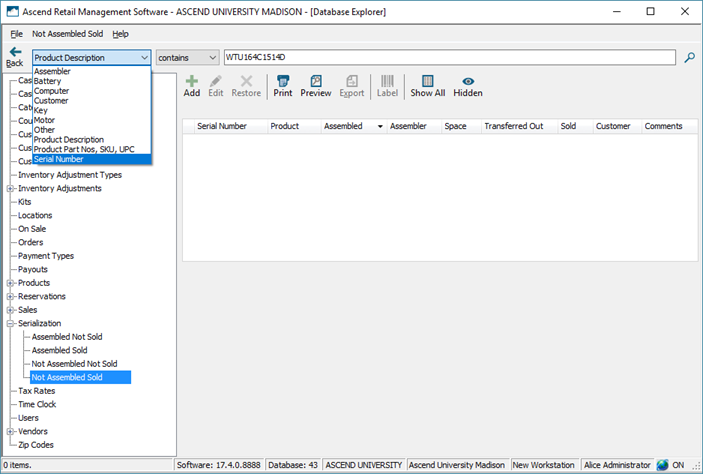
In the left pane, expand Serialization and select Not Assembled Sold. On the top toolbar, select the Serial Number search criteria, enter the serial number in the search box, and click the magnifying glass icon to search.
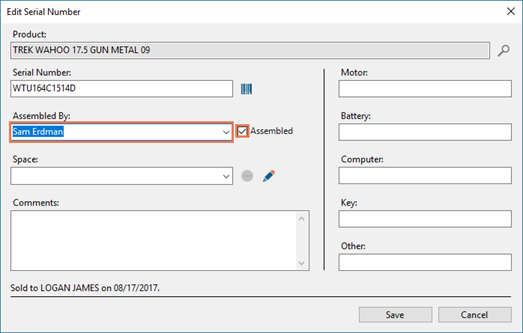
Double-click the serial number. In the Assembled By drop-down, select your name, check Assembled, and click Save.
Complete the repair as normal.
KB22-020
