Use this article to learn how to manage your Ascend QuickBooks functionality from anywhere with Ascend HQ. Before you get started, consider looping in your accountant or bookkeeper to ensure your Ascend configuration options align with your QuickBooks setup.
Making changes to Ascend configurations without properly matching your QuickBooks software settings WILL result in erroneous import/export data and/or completely failed processing.
Getting started
Prior to any setup being done in Ascend HQ, the Ascend RMS Client user profile must have the Bookkeeping - Ascend HQ permission enabled or the Accounting Integrations option will NOT be available.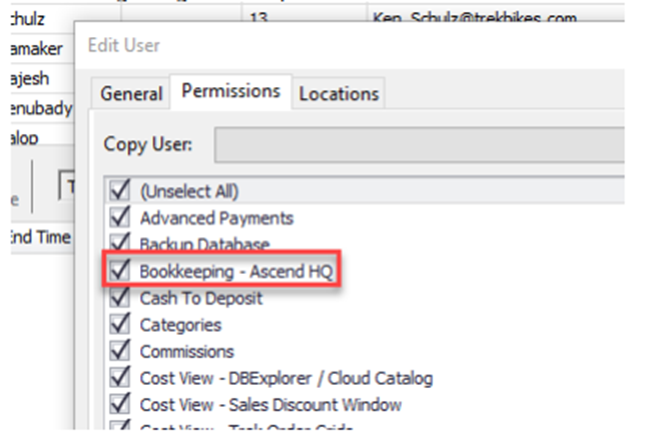
Before you're able to export any accounting data files from Ascend, QuickBooks must be selected as the active Accounting Integrator and ALL configurations must be set up and configured properly. If a QuickBooks configuration is NOT saved within the Bookkeeping Configuration menu, the QuickBooks General Ledger Summary IIF will be unavailable.
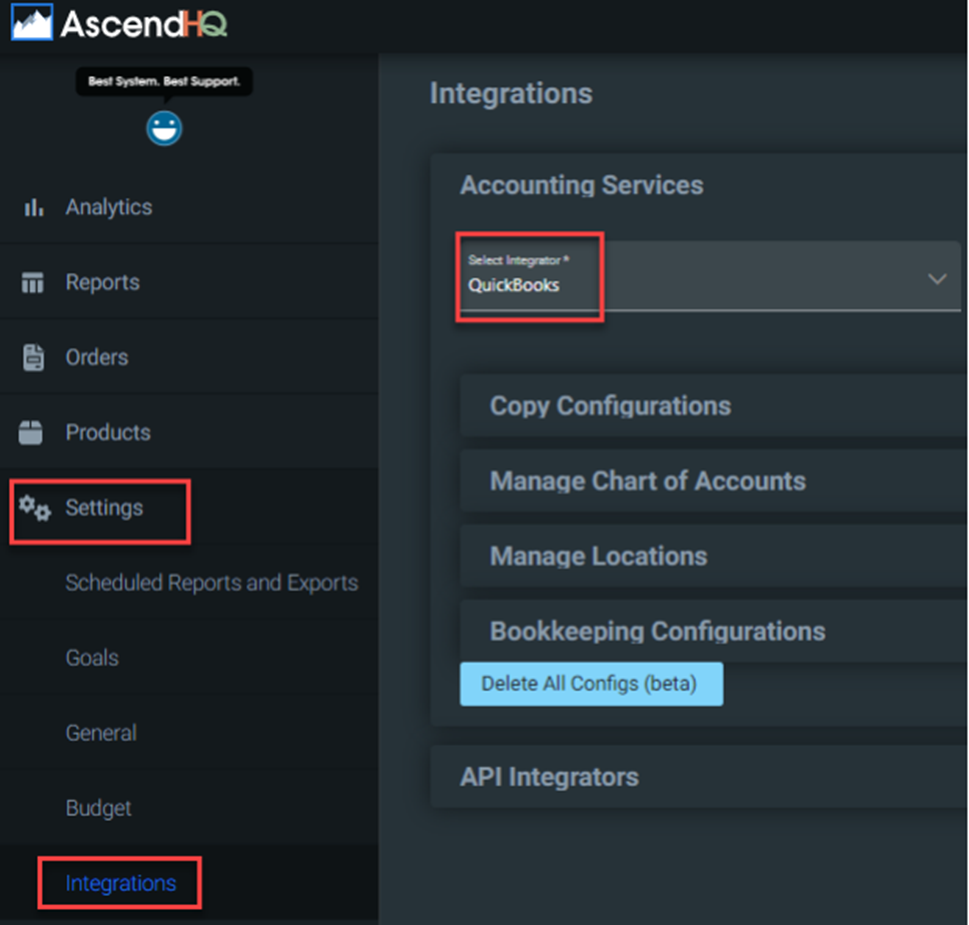
QuickBooks integration setup
- Log into Ascend HQ
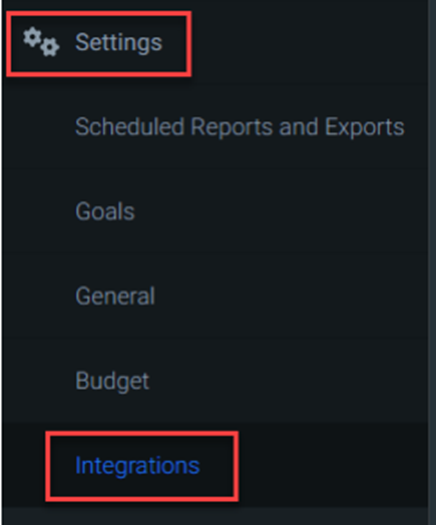
- Choose Settings
- Choose Integrations
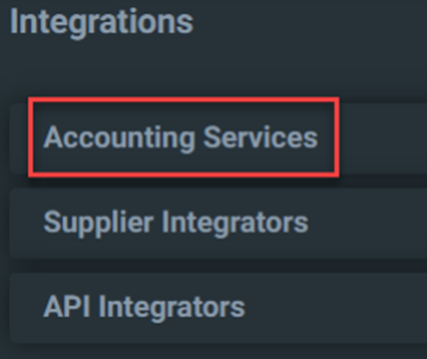
- Expand Accounting Services menu
- Select QuickBooks from the Integrator list. This option will be automatically selected in the drop-down if you have previously configured QuickBooks Integrations
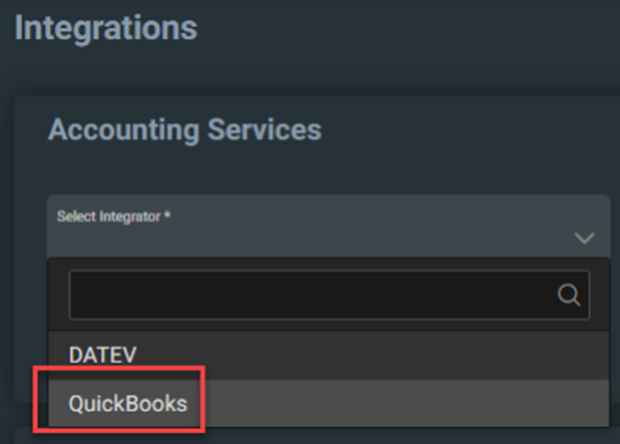
- Proceed with configuring fields under each menu tab as outlined below

- Apply/save your settings as you proceed through the menus and tabs
Manage multistore location reporting
This feature will enable you to assign a unique class names to a specific location. Class name MUST be unique to each individual location.
- Choose the Location from the drop-down

- Enter your desired location name in the Location Class Name field
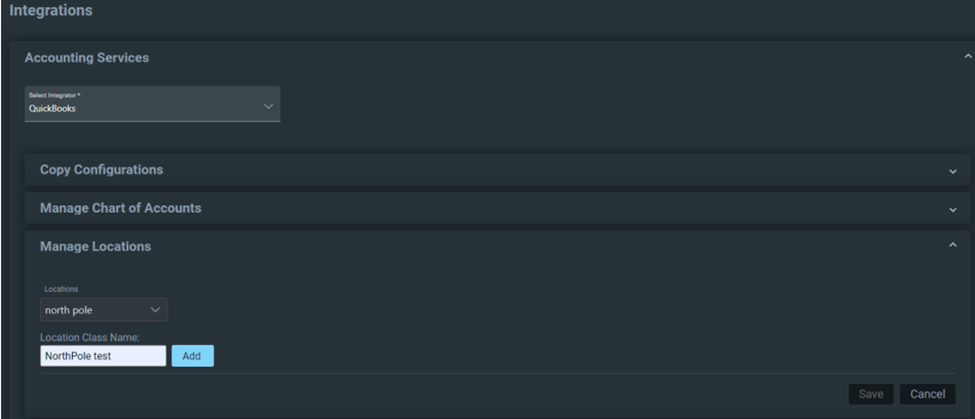
- Click Add

To update existing class names, select a previously added location from the drop-down menu, click the input field, and enter your new name. Then, click Update.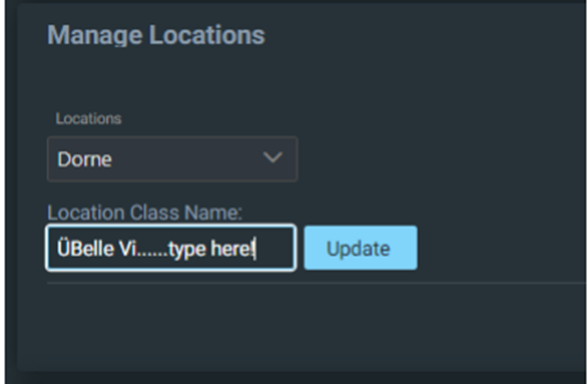
Configure
LOCATIONS: Choose the individual location in the Location(s) drop-down to apply your Options configuration to your selection, key in the values, then click the Apply button.
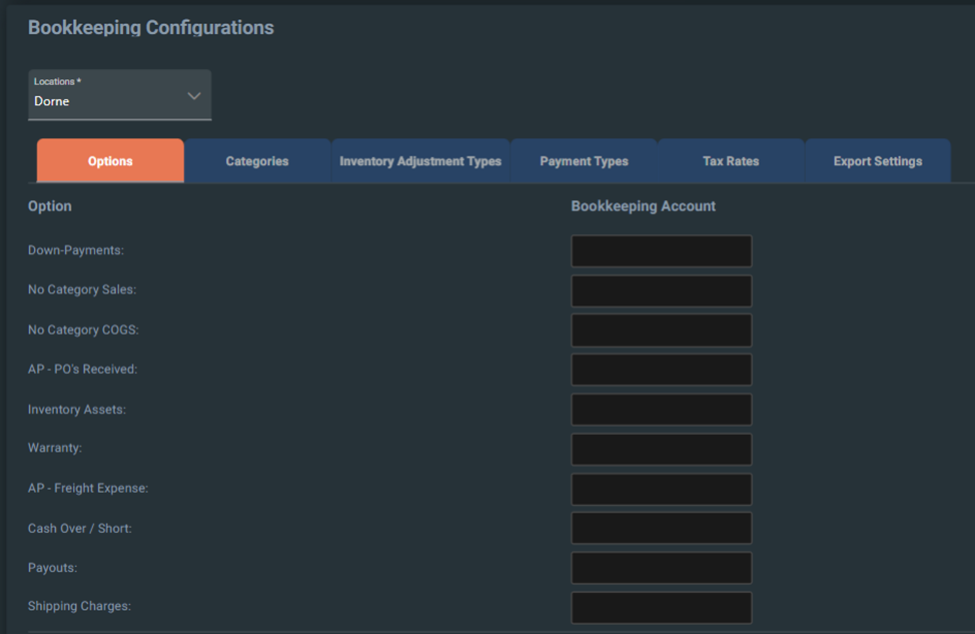
CATEGORIES: Choose the individual location in the Location(s): drop-down to apply your Categories configuration to your selection, key in the values, then click the Apply button.
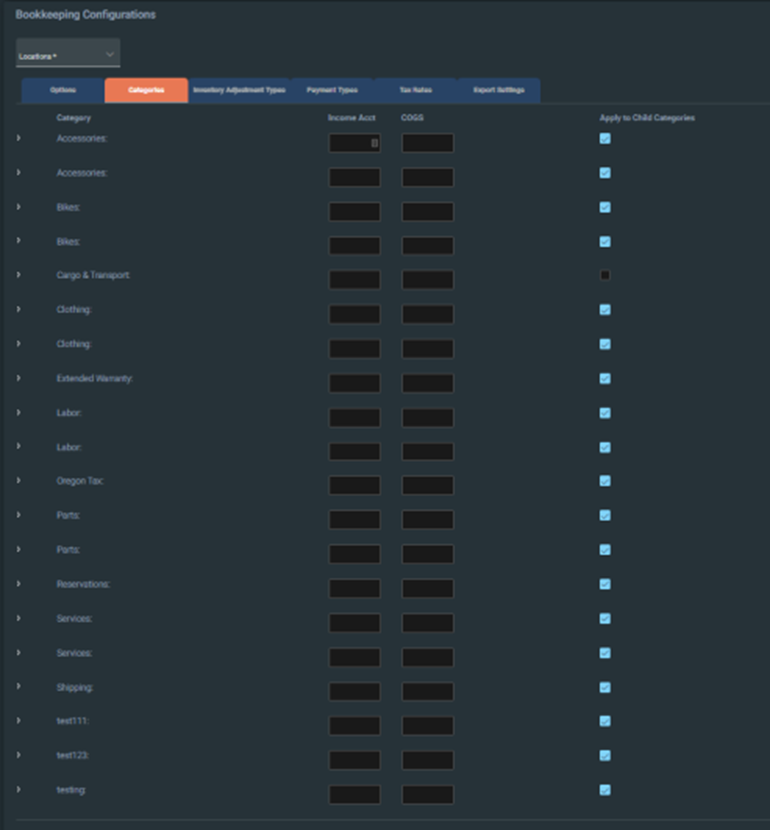
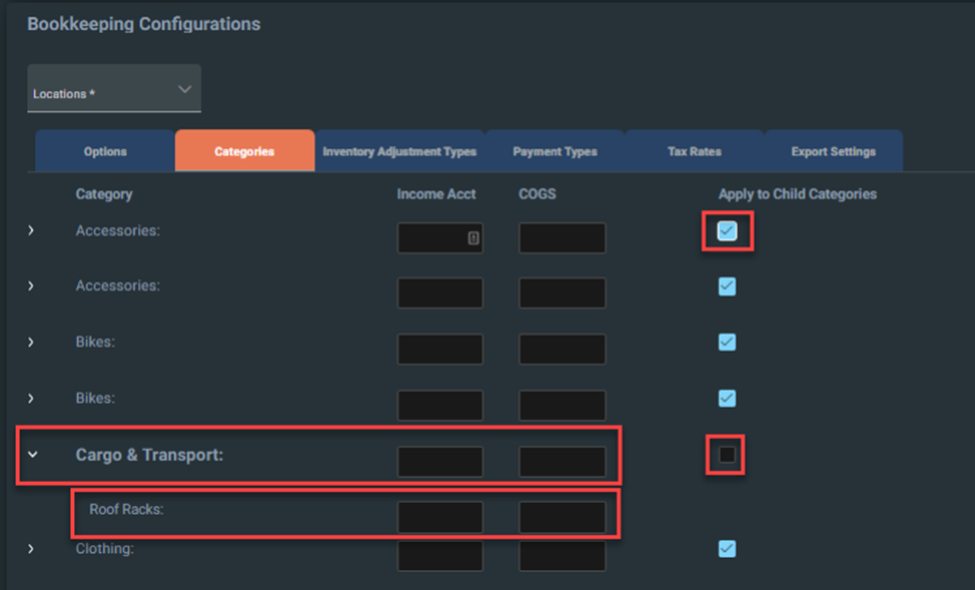
Much like with the Ascend app, you may apply ALL Bookkeeping Codes to Child Categories simply by selecting the Apply to Child Categories checkbox. If this box is unchecked, then you may drill down into the lower-level Child Categories to assign differing Ledger Accounts as needed.
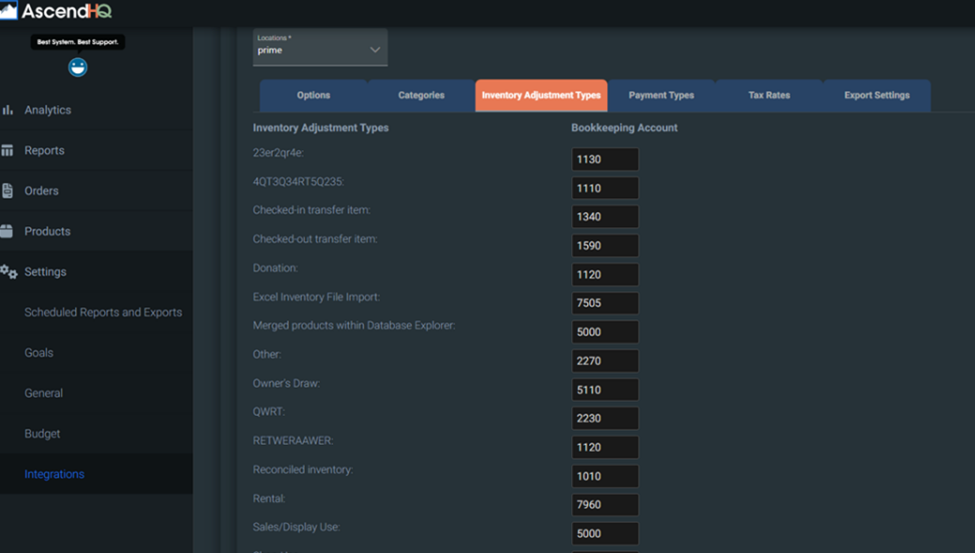
INVENTORY ADJUSTMENT TYPES: Choose the individual location in the Location(s): drop-down to apply your Inventory Adjustment Types configuration to your selection, key in the values, then click the Apply button.
PAYMENT TYPES: Choose the individual location in the Location(s): drop-down to apply your Payment Types configuration to your selection, key in the values, then click Apply.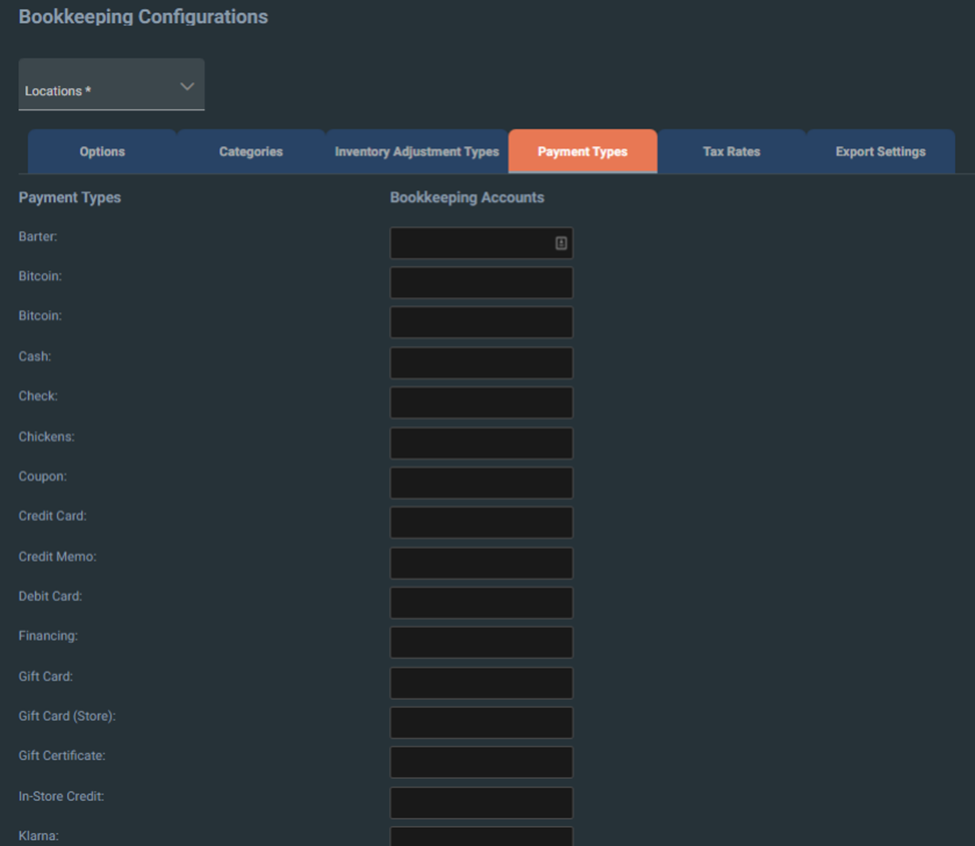
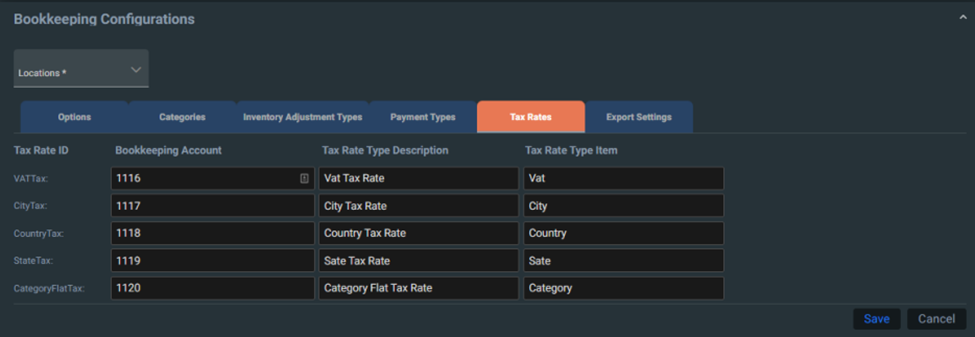
TAX RATES: Choose the individual location in the Location(s): drop-down to apply your Tax Rates configuration to your selection, key in the values, then click Apply.
Within this configuration menu you are able to change/update the following:
- Bookkeeping Ledger Account
- Tax Rate Type Description
- Tax Rate Type Item
Export settings
Choose the individual location in the Location(s): drop-down to apply your Export Settings configuration to your selection, key in the values, then click the Save button.

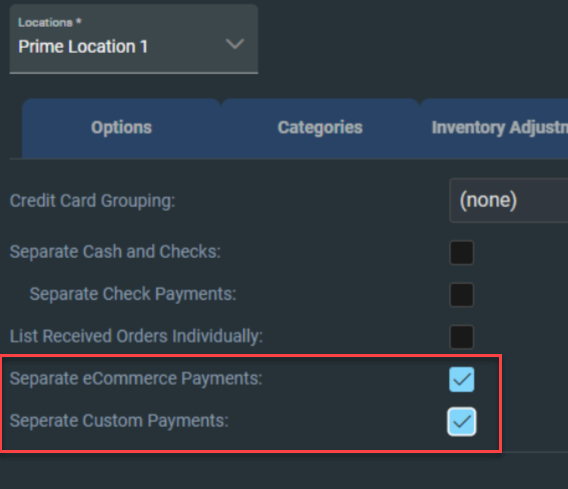
Configurations for separating or grouping cash and check and credit card payments will match that of the Ascend RMS client:

You may also select how your eCommerce and Custom payment types are exported within the IIF.
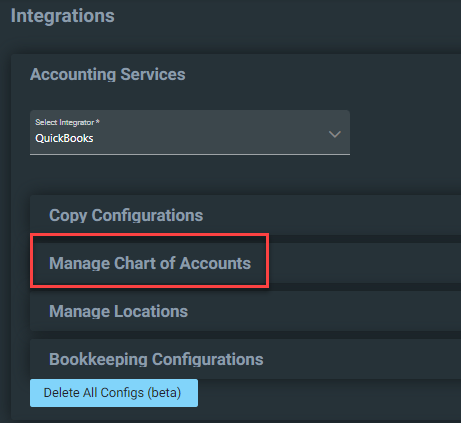
Manage Chart of Accounts
A Chart of Accounts setup file may be imported into the Ascend HQ Bookkeeping.
Importing Chart of Accounts
- Choose the location you want the configuration file to be saved to
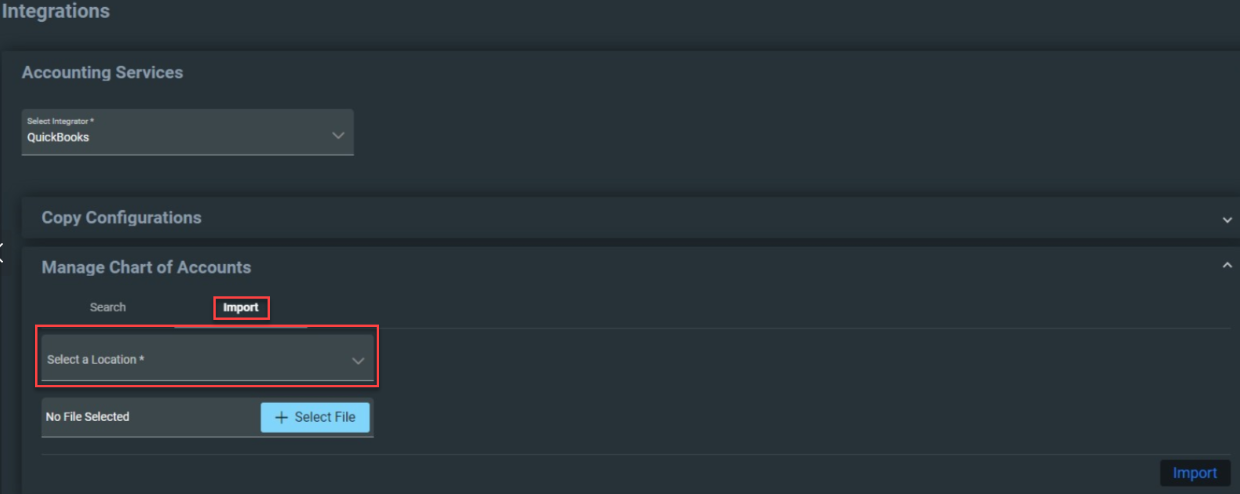
- Select the IIF file you want to import (must be the QuickBooks compatible IIF file type)

- You must select both the location and file an error message in either or both fields.
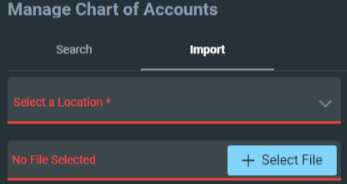
- You must select both the location and file an error message in either or both fields.
- Click Import

- Once the file is imported you will see the fields display a prefilled drop-down list with Ledger Accounts that were included within the Chart of Accounts IIF Import.
Pro Tips:
- If your Bookkeeping was previously configured, the system will automatically attempt to match Ledger Accounts already stored in with those found in the Chart of Accounts File.
- Any Ledger Accounts saved prior to a Chart of Accounts import that cannot be matched will be PERSISTED.
- You may key in values to search the existing Chart of Accounts for the corresponding account.
- You may override Ledger Account numbers from a Chart of Accounts file with those NOT in the Chart of Accounts simply by typing the value within the field and saving.
- This DOES NOT UPDATE the previously imported Chart of Accounts File and only applies the value directly to the stored configuration tables.
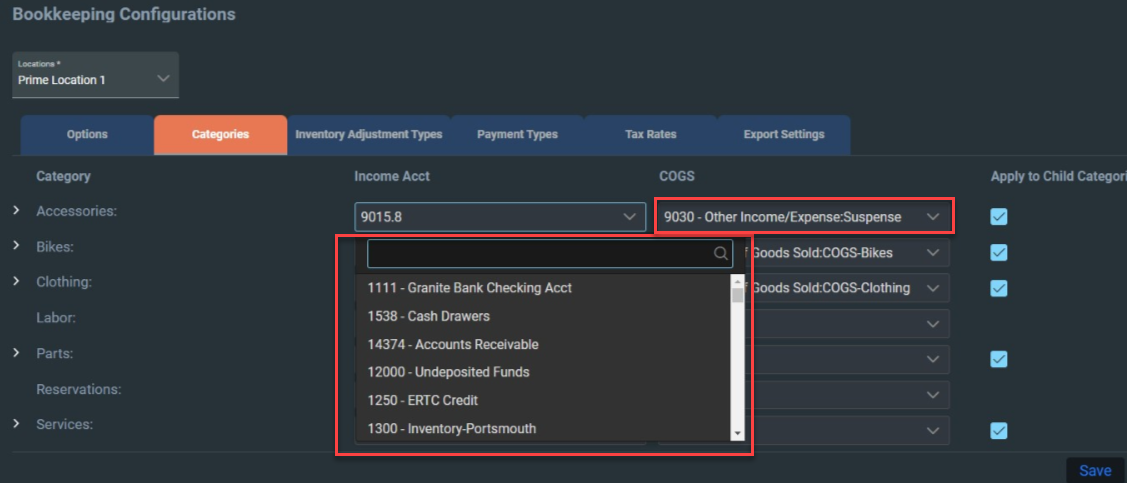
- This DOES NOT UPDATE the previously imported Chart of Accounts File and only applies the value directly to the stored configuration tables.
- Values on the Chart of Accounts vs. those keyed in manually (NOT found within the Chart of Accounts) should be displayed differently
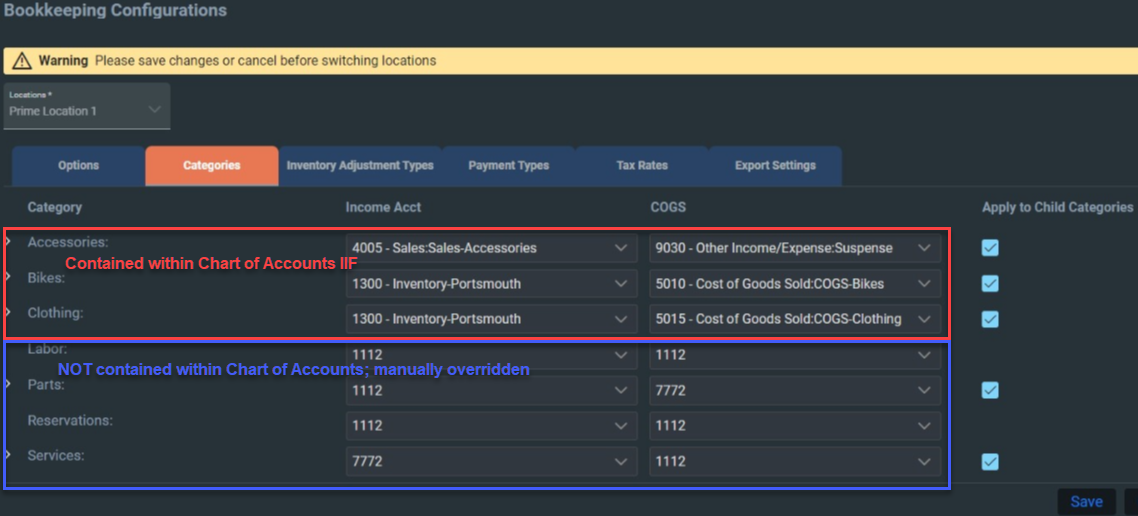
Editing Chart of Accounts
It is possible to edit your stored Chart of Accounts directly on Ascend HQ.
YOU MUST update your local QuickBooks application to ensure Ascend and QuickBooks are in alignment.
Please Note: Importing the Chart of Accounts File/Data in Ascend HQ DOES NOT sync your data to Ascend RMS Client.
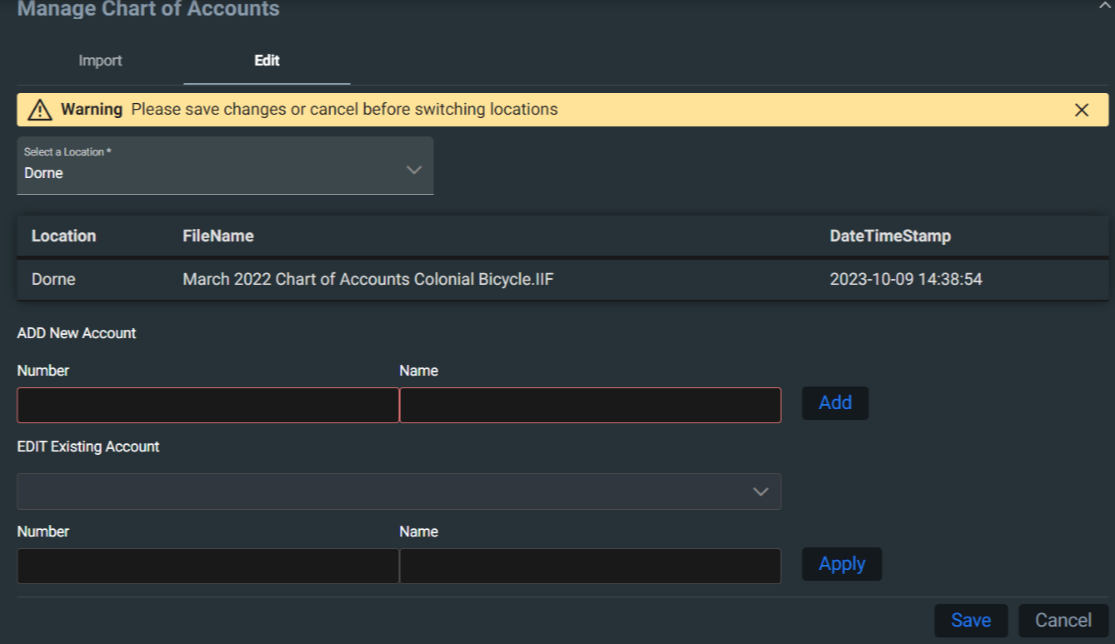
- Choose the Chart of Accounts File you would like to update in the table
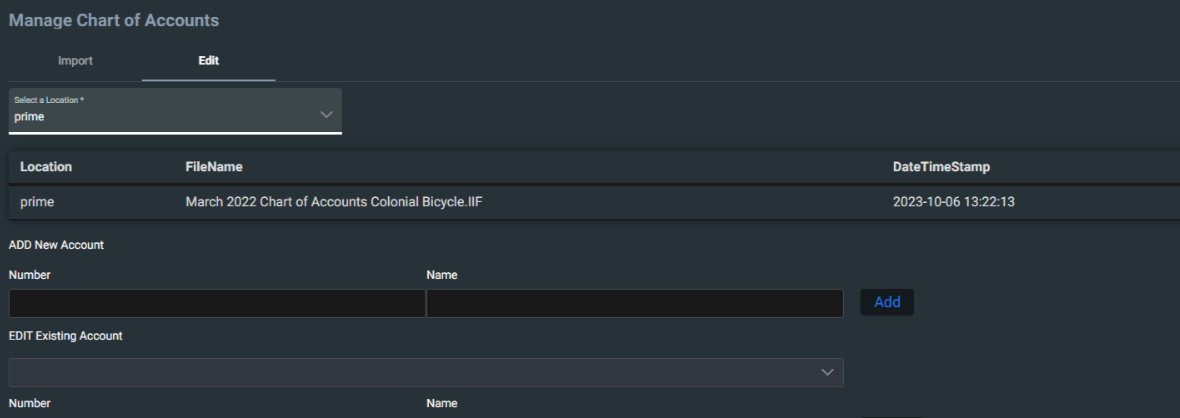
- Either Add a new account number, or Edit an existing number
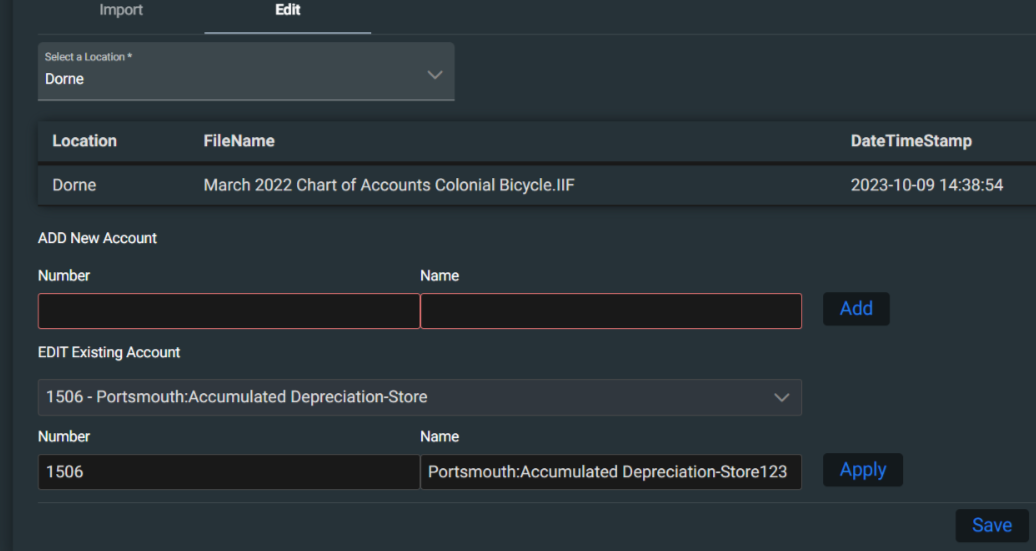
- Add or Apply your changes. Be sure to save your settings before moving to any other section or tab within Ascend HQ to avoid losing your changes
Copy Configuration
You may copy a previous location's bookkeeping configuration to another location by using the Copy Configuration feature.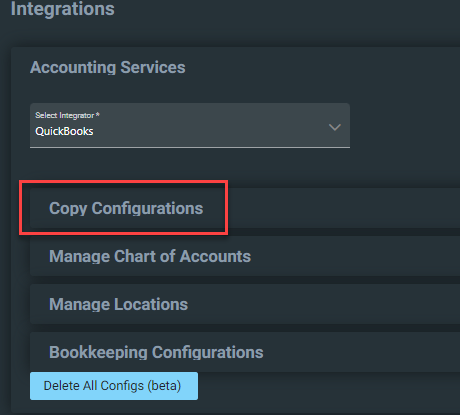
Simply choose the source location you want to copy the configurations FROM and the destination location you want to copy the configurations TO.
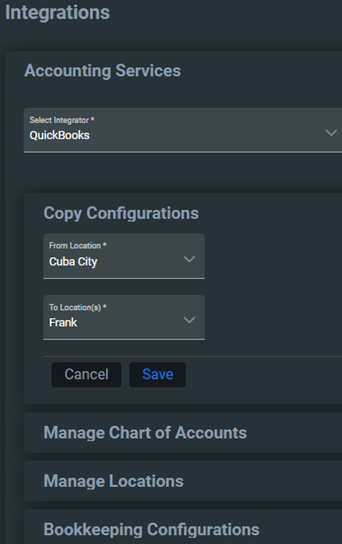
This should streamline the set up of new locations that have bookkeeping configurations mostly (or entirely) matching an existing location that was already setup.
Important considerations
- The QuickBooks Chart of Accounts, and configuration in general, DOES NOT necessarily translate to that within the Ascend RMS client as data isn't synched up between the two systems AND the export is generated from two different sources with completely separate queries (i.e. Local client DB vs. Ascend HQ Cloud Storage).
- You CAN overwrite existing bookkeeping configurations, so be certain you are copying and/or configuring the correct location before you save any changes.
- Be sure you update your QuickBooks application to match any changes you make to your Chart of Accounts stored within Ascend HQ.
- The Separate Custom Payment Types function is available ONLY from Ascend HQ.
- To reduce performance concerns and eliminate risk of overwriting bookkeeping configurations for an entire dealership, we limited the copy tool to only allow copying a single location configuration to ONE different location at a time.
FAQs
Why am I unable to see the Accounting Services Integration Settings menus in Ascend HQ?
- Your Ascend app user profile MUST have the Bookkeeping - Ascend HQ permission enabled in your user before you will have the Accounting Integrations option available to you.
Why am I unable to configure locations within the Bookkeeping Configuration tab?
- You MUST assign a QuickBooks Class within Manage Locations prior to setting up any other Bookkeeping Configurations.
Can I configure multiple inputs with the same Ledger Account Number?
- Yes, you can use the same accounts for multiple fields, however, that may not result in a desired outcome when exporting your General Ledger Summary.
Can I configure more than one location at a time?
- No, it is currently not possible to configure all locations simultaneously upon initial setup.
Will the QuickBooks Configuration functionality within the Ascend app continue to be available?
- Yes, you can still manage your QuickBooks configurations in either the Ascend app or Ascend HQ.
Will the QuickBooks Export IIF functionality within the Ascend app continue to be available?
- While you may still export the IIF from the client, it is being generated from a completely different data source. We recommend choosing using a single source for your exports and staying consistent.
Will configuration setting updates sync between Ascend HQ and the Ascend app?
- Options and Export Setting changes WILL be passed DOWN from Ascend HQ to Ascend RMS Client.
- Options and Export Setting changes WILL NOT be passed UP from Ascend RMS Client to Ascend HQ, but they CAN BE passed UP by calling support.
-
Inventory Adjustment Types WILL be passed in BOTH directions regardless of which side is changed (Ascend RMS or Ascend HQ).
- If a new IAT is added and/or configured within Ascend RMS it will get pushed to Ascend HQ.
- If you change configuration in Ascend HQ it will go back down to Ascend RMS.
-
Categories, Tax Types, Payment Types WILL NOT be passed DOWN from Ascend HQ to Ascend RMS Client.
- Any updates you make to Ascend HQ to those three data elements will need to be made within Ascend RMS client if you wish to export identical data from there until those features are removed/disabled.
- Categories, Tax Types, Payment Types WILL be passed UP from Ascend RMS Client to Ascend HQ.
- Updates made generally take just a few minutes to sync.

What happens if I am missing a configuration and attempt to export an IIF file?
- It is likely that your General Ledger Summary Export File will NOT be generated, and you will receive a notification with an attachment outlining the reason and the missing configuration(s).
What happens if I export an IIF File for a day that has no accounting data? - You will receive a notification email with an attachment advising you that no accounting data was available for the selected date(s).
Am I able to import my Chart of Accounts IIF Setup File into the Ascend HQ Bookkeeping Configuration Portal?
- No, this functionality is not currently available.
Am I able to import my Classes IIF Setup File into the Ascend HQ Bookkeeping Configuration Portal?
- No, this functionality is not currently available.
KB23-019