

Unsupported Hardware
The MC2180 is no longer supported. Please upgrade to the recommended device, which can be found here, Hardware - Requirements. Additionally, Microsoft officially discontinued support for the Windows Mobile Device Center software needed to connect the device to the computer.
Prep
- If you are using MC2180 scanners for your inventory, create a specific folder for storing your physical inventory count files.
- From the Windows Desktop, right-click in a blank area.
- From the displayed menu, select New > Folder.
- Enter a descriptive name, e.g. Physical Inventory - <YYYY>.
- On the keyboard, press Enter.
- If you are using an MC2180 or MC1000 inventory scanner, verify an SD memory card is installed in the inventory scanner:
- MC1000 model: 2 GB standard only.
- MC2180 model: Up to 32 GB microSD.
Moving the scan files to the computer
Once you've finished scanning your products, it's time to move that data to your computer. Article: Walking through the inventory scanning process for Cycle Counts and Full-Store Inventory
Pick up the scanner and touch the screen or press the blue button and then 0 (zero) to finalize the file.
Make sure the scanner is on the main scan screen before docking it. Otherwise, the section file name and count will not show in the file folder.
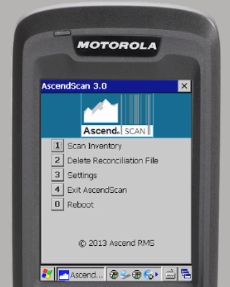
- Dock the scanner.
- The Windows Mobile Device Center should launch. If it doesn't search for Windows Mobile Device Center on your computer, and open the program.
- The Device Center should show that the scanner is connected.
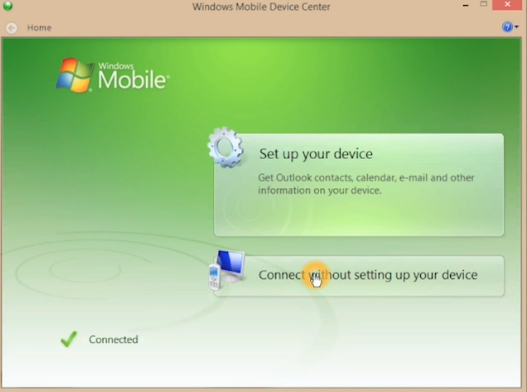
- Select Connect without setting up your device > File Management > Browse the contents of your device.
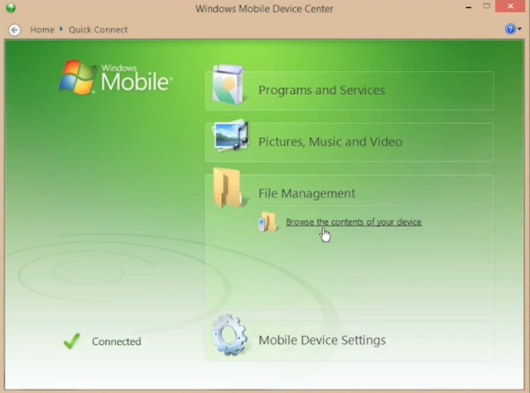
-
File Explorer opens. Select Storage Card.
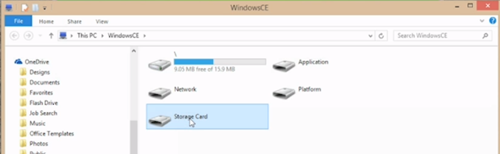
The file you're looking for should be labeled section[#]_count[#] (for example: section036_count104).![Screenshot of File Explorer with section[#]_count[#] selected](https://static.helpjuice.com/helpjuice_production/uploads/upload/image/13568/2498483/Inventory_Importing_FileExplorer2.png)
- Right-click the file and select Copy.
- Open your Inventory Files folder.
- Hit Control + V on the keyboard to paste the file into that folder.
- Write the section count number in the Scan count column on the Section status checklist.
Importing the files into Ascend
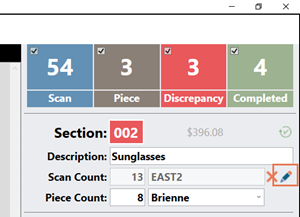
After scanning, initial the scanner line of the section number print-out, and head back to the inventory point person’s workstation. Dock the MC2180 scanner again. Highlight the appropriate section in the Inventory Center and click the Edit icon by Scan Count.
The Section Inventory Scans screen opens. Go to Add Selected Group of Scans and click the Add icon to open File Explorer.
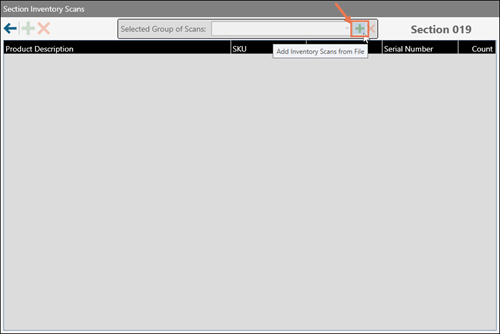
With the MC2180 scanner docked at this workstation, you can easily navigate to the section file on the scanner and import it into Ascend.
On the Section Inventory Scans screen, you can also select the Add Inventory Scan icon on the left to manually add a product to the scan, and update that product count, if needed.
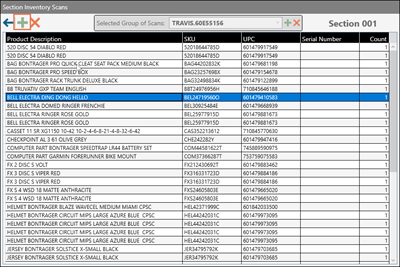
Click Back when you’re done.
After a scan file is manually imported, the section will turn brown, like normal, indicating that it’s ready for a physical piece count. That section will disappear from your Scan Items list and appear in the Piece Count list on the Unitech EA660 Plus scanners.

Then delete the section file from the MC2180 scanner, and your staff can move onto another section with that scanner - or move onto piece counts if scanning is complete.
Scan counts with the MC2180 inventory scanner (unsupported)
It's important that each section is scanned in it's own file.
Then select 1 for scan inventory on the scanner and enter the Section Number into the scanner.
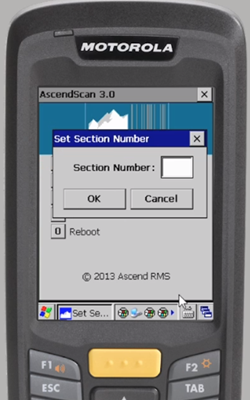
Select OK and head to the section to start scanning. Just press the yellow button to scan an item. Make sure to scan every single item in your section. If you have a lot of items in a row (or on a hook), you still need to scan every individual item. Do not assume they are all the same size or color.
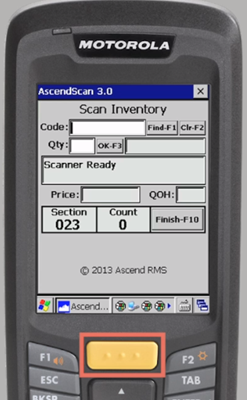
If you encounter any bad beeps, check the item for a second barcode and try scanning that one. If you are not able to scan the item, take it out of the section and bring it to your team's “mystery box.”
After scanning the section, initial the Scanner line on the section number sheet.
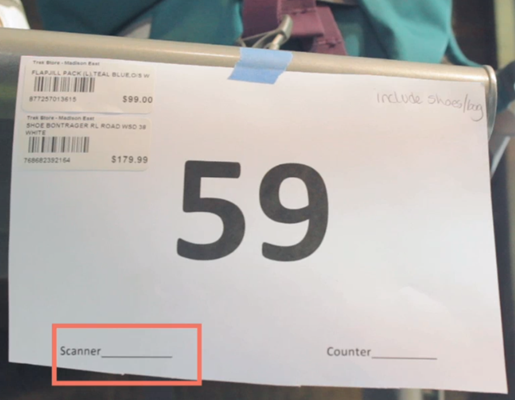
You might notice the count number on the scanner seems to be "one short" - it's not! The scanner has the final item information currently on the screen, and will add it to the file.
Now bring the scanner back to your inventory point person so they can collect the file information. We recommend placing scanners with new section information on them facedown on the counter. Once the inventory point person has obtained the file and cleared the scanner for use again, they'll lay them down face-up for your team members to grab.
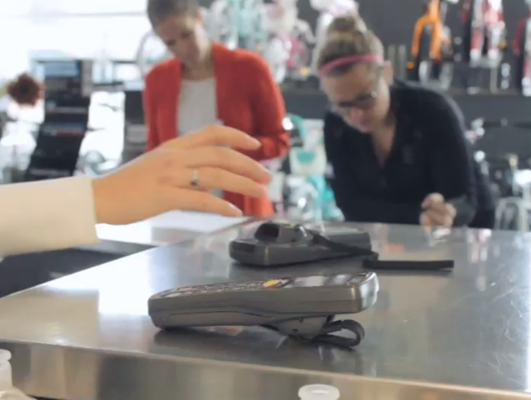
Then, if available, grab a new scanner and start scanning another section!
Double scans on the MC2180 scanner
Uh oh! Did you just double-scan an item? Don't worry, you can fix it easily.
If the very last item you scanned was a mistake, it's information is still on the screen and it hasn't technically been added to your count yet.
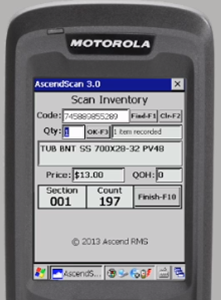
Hit the 0 (zero) button on the scanner.
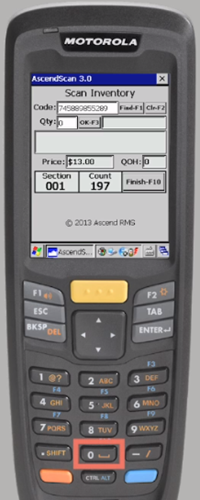
Then hit Enter. The scanner should now show 0 [zero] items recorded and you can continue scanning the section.
![Screenshot of the scanner with 0 [zero] items recorded highlighted](https://static.helpjuice.com/helpjuice_production/uploads/upload/image/13568/2498726/Inventory_Doublescan3.png)
KB22-110