

Permissions Needed:
Check out our article, Users - Permissions for a Cycle Count or Full-Store Inventory.
For a Cycle Count, you need to know what Category(s) you are scanning and where they are located. Typically, you should not need to section off the store during Cycle Counts.
For a full-store inventory, at this point, you should already have the store sectioned off with your section numbers and blue painter's tape, have created an Inventory Event, and configured your Inventory scanners.
Articles:
- Inventory Center - Preparation: Setting Up Sections
- Inventory Center - Creating and Navigating Inventory Events
- Inventory Scanner - Connect the Inventory Scanner to your Wi-Fi Network.
Note: Give your service team and service area priority for scanners, and have them start right away in the morning. There are a lot of little pieces in the service area, so this area tends to take the longest.
Scan counts with the EA660 or EA520 Inventory Scanner
- From the AscendScan desktop > Click Inventory Center.
- Verify the radio button next to Scan Items is checked.
- Note: Any sections that need to be scanned display in the lower part of the screen.
- To claim a section and start scanning, you can either:
- Scan the barcode of the Section Number sheet within the section.
- Physically enter a section number in the middle of the screen
- Click the radio button for a section in the lower part of the screen,
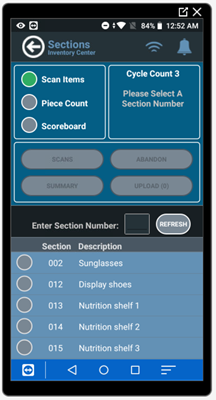
Note: It will not let you choose a section that someone else currently has open on their scanner or has already scanned, and you can select Refresh at any time to see how far your coworkers have gotten.
The section number, and section description (if one was added in the Inventory Center) display in the middle of the screen. Once you’ve verified the section information on the scan screen, you're ready to begin.
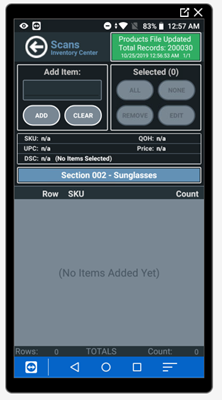
- Press the blue button on either side of the scanner to scan a product. You can scan product SKUs, UPCs, or Serial Numbers.

- Scan every single item in the section individually in the section.
- Do not assume that all of the gloves in a row are the same size. Or that all the handlebar tapes are black.
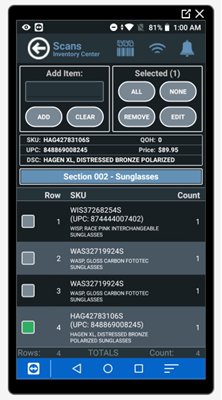
- The item is added to the section list and the item details are visible on the scanner (SKU, UPC, and Product Description).
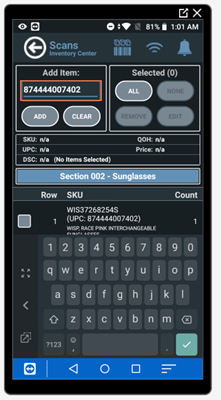
Note: If needed, you can manually type in an item UPC, SKU, or Serial Number in the Add item field on the scanner.
- After you've scanned all the products in the section, you can complete the section a couple different ways.
- Scan the barcode on the next Section Number to submit this section and move onto the next,
- Or select the back arrow on the scanner to go to the Scan Items screen and then click Upload for this section.
- Note: If Confirm Scanned Data Uploads is turned on in your scanner Settings, you’ll get a Confirmation request to verify you want to upload the section data. Click Yes if you’re ready to upload the information.
- To update the setting to automatically upload scanned data, check out our article, Inventory Scanner - EA660: Setup Device and AscendScan or Inventory Scanner - EA520: Setup Device and AscendScan.
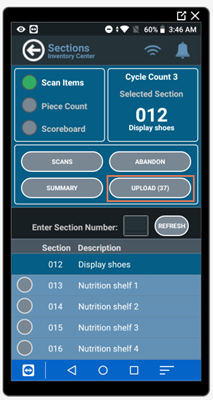
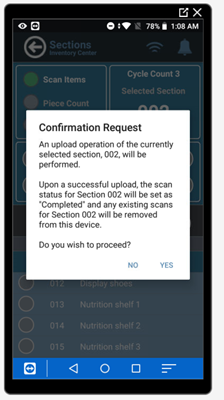
- You should also initial the scanner line of the section number print-out taped in your section. This is another indicator for your coworkers that the section has been scanned and is ready for a piece/physical count.

Bad Beeps (AKA items that won't scan)
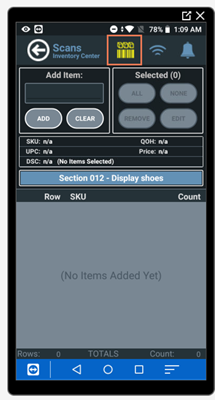
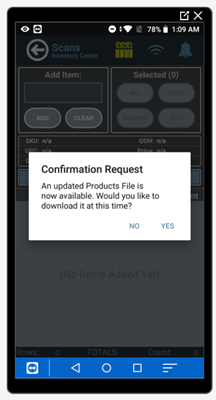
If you encounter any “bad” beeps, click the Inventory icon at the top of the scan screen to confirm you have the most up-to-date product files from Ascend.
 |
 |
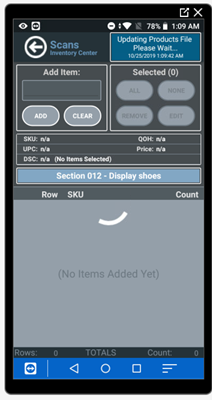 |
If you update the product files and it still gives you a “bad” beep, check the item to see if there's a second barcode that can be scanned. If the second barcode gives you a good beep and pulls up the correct product, you can continue scanning items in the section.
If there isn't another barcode or it also gives you a bad beep, then the item needs to go into your Mystery box (AKA "bad beep area") for items that won’t scan correctly. These items should have their own section for your inventory and the inventory point person will be responsible for handling those products once all other products have been scanned.
What if I Double-scan an Item?
The last item you scanned is already selected on the list, but you can select a different item or multiple items using the radio buttons to the left of the scan items. You can also use the All and None buttons at the top of the screen to select items.
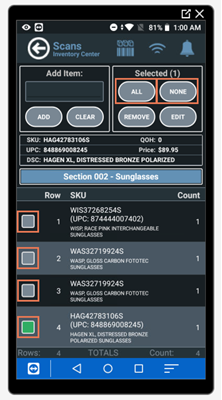
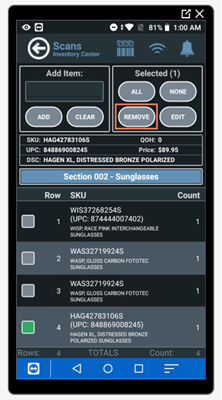
Once the incorrect item is highlighted, click Remove.
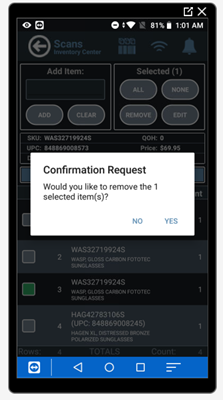
Then confirm you want to delete the item(s) from the scan file.
Can a I Edit a Section File?
- Select the Edit icon next to the Scan Count field.
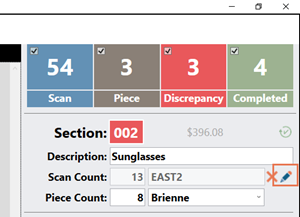
- The Section Inventory Scans window opens. Even if the items were scanned, you can see and remove individual products from this section list.
- Update the product Count.
- If you want to remove an item, enter 0 (zero) into the Count field.
- If you want to change or modify the quantity scanned, enter the new qty into the Count field.
- The changes are auto-saved.
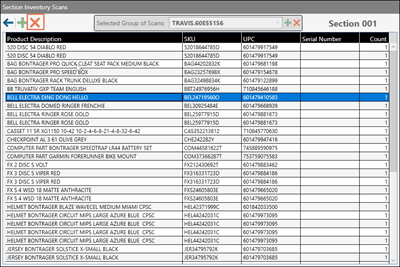
You can also click the Add icon on the right add another item to the list in the Product Search window.
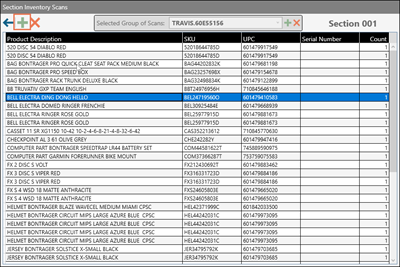
Click the back arrow to exit the Section file.
What if I Mess Up a Section?
It's not a big deal - and we'd rather you were honest about it now. If the scan file has not been submitted yet on your EA520 or EA660 inventory scanner, you can simply select the All button at the top and then Remove to delete all the items.
You also can select the back icon to return to the Scan Items screen, and then select Abandon to release the section. You may need to hit Refresh on the Scan items screen to have the section appear again.
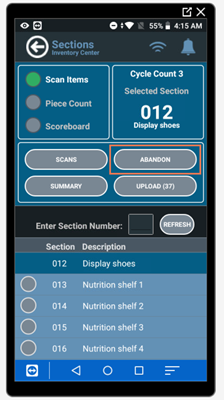
If you have already submitted the scan file and need it deleted, go visit your point person at the computer.
Delete a Section file from the Inventory Center
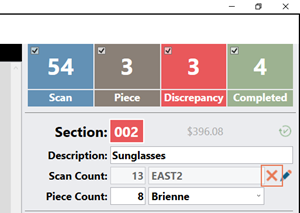
- Highlight the section in the Inventory Center and to go the Scan Count area.
- Select the Remove icon next to the Scan Count to delete the scan file.
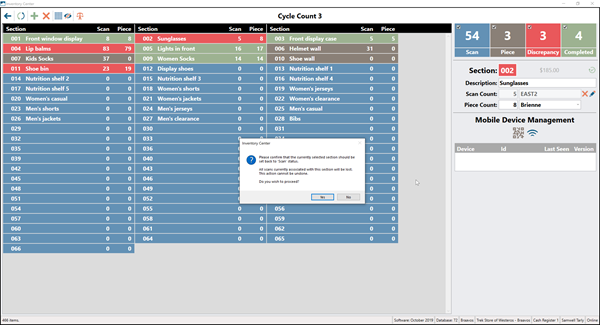
- A popup will appear confirming you want to delete the scan file.
- Click Yes to remove it and set the section back to Scan status.
Piece/Physical Section Counts
After a section has been scanned, it's time for the physical count. It's important to save the physical count until after the scan count, in case of bad beeps. Once the scanner is done and the "bad beep" items have been moved to the "mystery box," it's time for a physical count.
For example, if I decide to count a section first, and then the scanner later has five bad beeps that need to be relocated to the Mystery Box, my physical count is going to be five higher than the scan count.
- Navigate to the Piece Count page using the radio buttons.
- Note: Any sections that have already been scanned, but have not been physically counted yet, appear in this list.
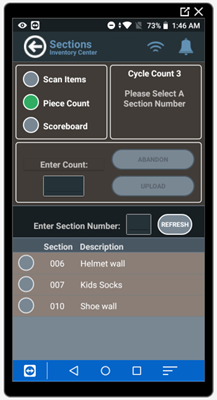
- To claim a section and start counting, you can either:
- Scan the barcode of the Section Number sheet within the section.
- Physically enter a section number in the middle of the screen
- Click the radio button for a section in the lower part of the screen.
Note: It will not let you choose a section that someone else currently has open on their scanner or which has already been counted, and you can select Refresh at any time to see how far your coworkers have gotten.
The section number shows in the upper right corner of the scanner. Take your time and physically count each item in the section. Display items on mannequins should be counted. Make sure to check for accessories on bikes such as kickstands or lights.
- Enter the total number of items in the Enter Count field.
- Click Upload.
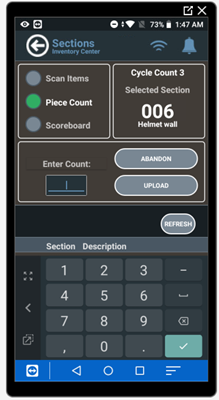
The section should disappear from the Piece Count page on your scanner, but make sure you still initial the counter line on the section number of that section, since you might have coworkers without scanners doing piece counts as well.
Manually Enter Piece/Physical Section Counts
We recommend prioritizing your EA660 or EA520 inventory scanners for the Scan Counts. Once all scan counts are done, feel free to use them for Piece counts too.
Otherwise, staff members can pretty easily do things old school, and use a pen and paper for their piece counts. Just make sure people are initialing the Counter line on the Section number print-out taped in your section.
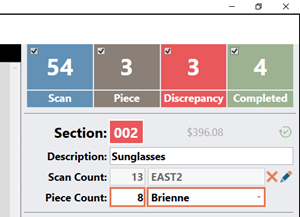
If you're using pen and paper for piece counts, you'll need to enter the data in the Inventory Center in Ascend. Highlight the appropriate section and click into the Piece Count field. Enter the number of items that were counted in that section. You can also enter the counter’s name, if needed.
AscendScan Scoreboard
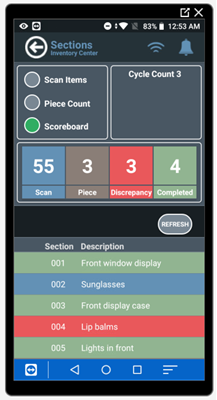
On the EA660 or EA520 inventory scanners, staff can easily see your progress by navigating to the Scoreboard. You should recognize this page from your Inventory Center in Ascend.
Note: The Scoreboard cannot be accessed during a scan. Your current scan will either need to be uploaded or the section needs to be abandoned.
Comparing Scan Results
If the Piece Count does not match the Scan Count, the tile turns red on Ascend's Inventory Center or the scanner's Scoreboard, indicating that there is a discrepancy between the two.
For bigger ticket items or higher cost sections, it is important that you verify the counts.
Piece/Physical Recount
Since piece counts are usually faster than scanning, send someone back to do a physical recount of that section. It can be the person who originally counted the section.
You can clear out the first Piece Count number and have the person use their scanner, or have them do the recount and let you know the new count which can be manually entered into the Piece Count field.
If the number they come up with matches the first Piece Count, you need to send someone to rescan the section.
Rescanning a Section
- Highlight the section in the Inventory Event. The section details appear on the right.
- The Scan Count area is where the scan file lives.
- Click the Remove icon by the Scan Count to delete the file and send it back to the Scan list.
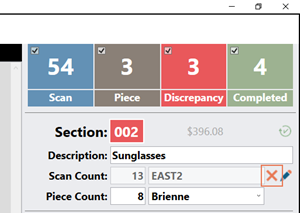
If the numbers still don't match, send your scanner and counter out together to go through the section. If they still can't resolve the issue, send someone new out to help.
Edit a Section File
You can also check out the specific item list for the section by selecting the Edit icon next to the Scan Count field.
The Section Inventory Scans window opens. Even if the items were scanned, you can see and remove individual products from this section list.
You can also click the Add icon on the right add another item to the list in the Product Search window.
Once the Scan Count number and the Piece Count number match, the section will move to Completed status and turn green.
Force Section to Complete Status
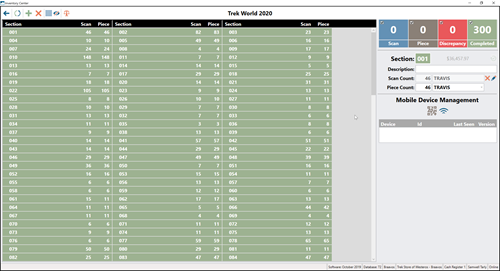
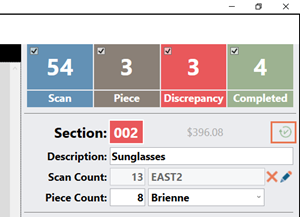
If there is a large/low-cost section, like Nutrition, Spokes, etc., it might be okay with if the count is off by two. If so, then select the Force Section to Complete status icon to remove the discrepancy.
- In the Inventory Event, highlight the section.
- Below the Completed status box, Click the icon noted below.
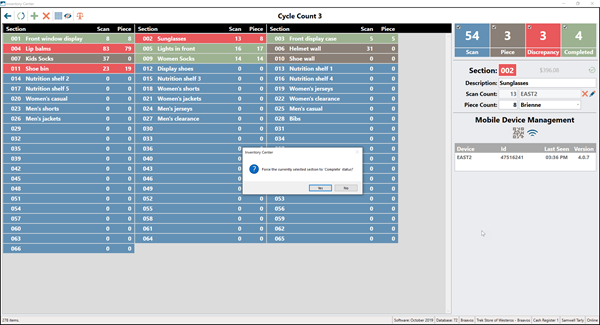
- A pop up appears confirming you want to mark this section complete. Click Yes to complete the section.
Additional Resources
KB22-125