Categorization is one of the many ways Ascend helps you organize your inventory. With every product appropriately assigned to a Category your data and reporting is going to be a lot stronger and more useful to your business.
Categories can be:
- Top level or Top Parent Categories
- Mid-level or Parent Categories
- Sub-categories or Child Categories
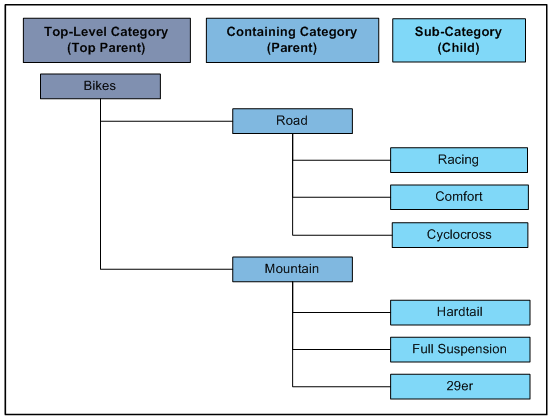
You should have no more than 10 top level categories in your system and no more than 4 levels of sub-categories for each parent.
This lets you get big picture reports that can be narrowed down without getting too confusing.
We recommend naming categories using their Top Parent - Parent - Child category. For example, we could have a category called Bikes - Mountain - Full Suspension.
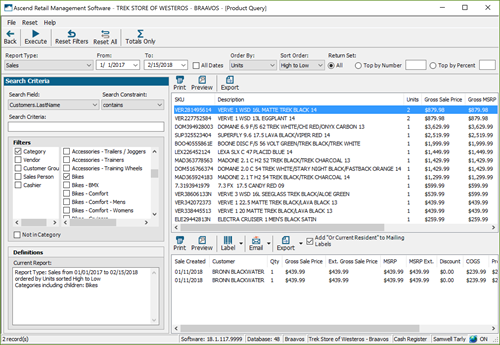
In most reports in Ascend, selecting a parent category will also include that category's child categories in the report.
For example, you could create a Product Query to see this week’s sales for Bikes to see all bikes, including Road.
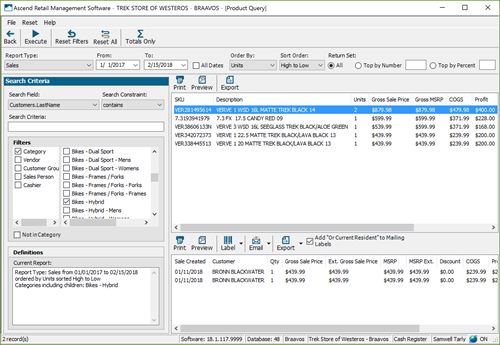
Or you could run the query for just Hybrid bikes.
Create a category
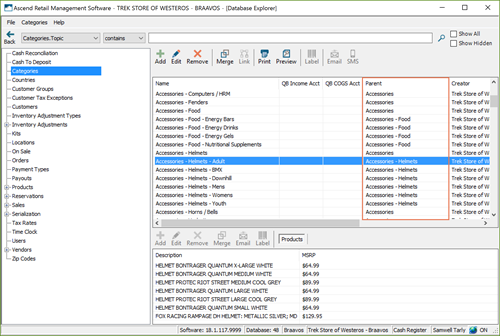
Navigate to Database Explorer > Categories in Ascend.
You can highlight a Category to make the Edit and Remove icons active. For now, let’s select Add to create a new category.
Create a Name for your category that follows the suggested naming layout, such as Bikes [dash] Electric.
Add a category Code, if you like.
If this is a sub-category, select the parent category from the drop-down menu
If this is a serialized category, check the box for Serialized.
You can also check the Allow Scheduling box to let appointments be created for the category in the Scheduler.
If this category is taxed different, update the Category Tax column for Tax rates. For example, a Labor category might have a tax rate of zero.
In the lower part of the screen, you can connect the Category with your Quickbooks accounts as needed.
And finally, if this category will have its own child categories below it, you can check the box for Apply Settings to Child Categories, if needed.
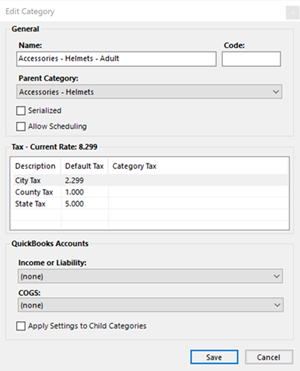
Then click Save.
The new category appears in the list. If it has a parent category, you can see it in the Parent column.
Category reports
There are several useful reports available in Ascend that related to Categories. Let's go over a few of them!
Select the Reports icon from the Ascend desktop.
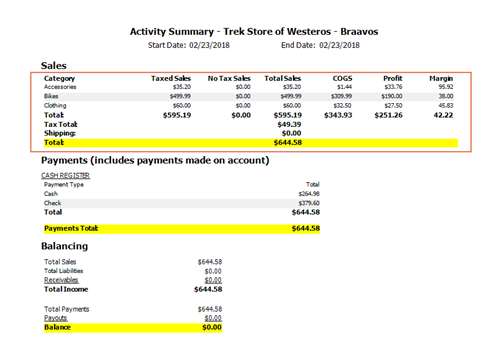
The Activity Summary report under the End of Day section opens on the left. In the first section of this report, sales are organized by Category.
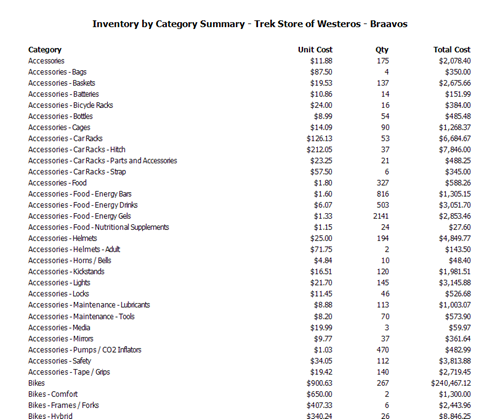
Now scroll to the Inventory section and double-click the Inventory by Category summary report. This report summarizes all products currently in inventory by their Category, and includes the category’s average Unit Cost, the total Quantity of products for that category, and Total Cost.
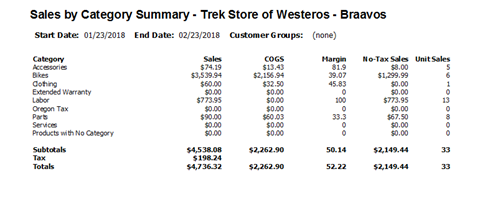
Next, scroll to the Sales section and find the Sales by Category Summary report. Edit the date range if needed and click Refresh.
This report summarizes all sales transactions in the date range by their Top-level category. For each top-level category, it includes Sales dollars, the Cost of Goods Sold, the Margin, any No-Tax Sales dollars, and the number of Units that were sold.
You can filter by categories in the Product Query tool - but you can also filter by category in the Customer Query tool!
![]()
Additional Resources
KB22-185
