

Supported Devices
Ascend supports the EA520 and EA660 devices. If you have additional questions about support devices and hardware requirements, check out our article, Hardware - Requirements.
If the EA660 scanner is purchased from a 3rd party supplier, there's the possibility that the scanner will not function correctly. In addition, there would be an additional charge for the AscendScan application.
Please contact the Ascend Business Development for more information (sales@ascendrms.com).
Physical Device Setup
Adding Battery
Place the battery in the back of the device.

Handheld Strap Placement
If you would like to use the scanner as a handheld, place the strap on the back of the device using Velcro strap.

Cradle/Grip Placement
If you purchase a cradle/grip for the device, you will need to remove the Velcro strap, bar, and black film (this covers the connection).

Android Setup
Turn the Device on using the power button (top button on the right-hand side of the device).
Display Settings
Screen Timeout: Settings > Display > Lock Display > Screen timeout
Dark Theme (put device in dark mode): Settings > Display > Appearance > Dark theme > Click to enable.
Location Settings
Use Location: Settings > Location > click Use location to turn on.
Wi-Fi Scanning: Settings > Location > Location services > Wi-Fi scanning > Click to enable.
Bluetooth Scanning: Settings > Location > Location services > Bluetooth scanning > Click to enable.
Privacy Settings
Usage & diagnostics: Settings > Privacy > Usage & diagnostics > Confirm this setting is disabled.
Unitech Scanner Service
USS Factory Default: Settings > USS (Unitech Scanner Service) > (choose the Factory Default menu option)
Sound Settings
Volume: Settings > Sound & vibration > Adjust levels to approximately 20%.
Install AscendScan
EA660 Devices come with AscendScan preloaded. If your device does not come with AscendScan preloaded, please contact Ascend Support for assistance.
AscendScan Setup
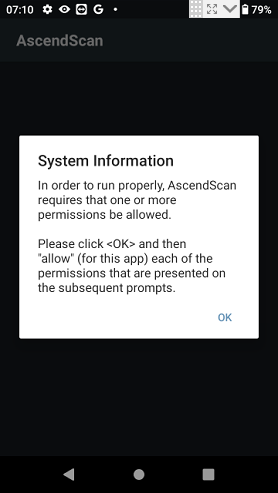
After starting AscendScan, the following permissions prompts will appear.
- Select OK to continue
- Select WHILE USING THE APP for the pictures and record video permission request

- Select ALLOW for the photos, media, and files permission request

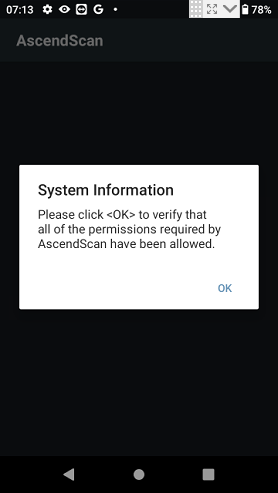
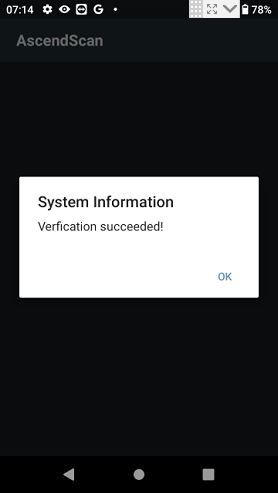
- Verify that the required permissions for AscendScan have been set by clicking OK on the next two verification screens
- Once the Welcome to AscendScan screen launches, press Click to Get Started on the screen.

- Click OK to the AscendScan Configuration prompt.

- Enter a Device Name (max of 8 characters).
- Click Yes to Device Name Confirmation Request.


- Click Scan QR on the Connect to the Ascend Agent prompt to connect the device to your network through the Inventory Center. Check out our article, Inventory Scanner - Connect the Inventory Scanner to your Wi-Fi Network.

- Once connected to your Wi-Fi network, you will be prompted to Review the Privacy Policy. Click Accept.

- Click Yes to the Confirmation Request prompt.

- Click OK to the AscendScan Configuration confirmation prompt.

- Click Continue to the Welcome to AscendScan prompt.

- You will be taken back to the main AscendScan screen with three tiles:
- Inventory Center
- Settings
- Utilities
Update AscendScan Settings
Confirm AscendScan Version
Click the Utilities tile on the main AscendScan screen.
- Utilities > About > Verify the AscendScan Version is 4.1.3. If you do not see 4.1.3 listed, click the Check For Updates button.
AscendScan Settings
Click the Settings tile on the main AscendScan screen. Any updates/changes are Auto Saved.
-
General
- Language: Confirm correct language is set.
- Device Name: Confirm or modify Device Name.
-
Scan Notifications
- Good Scan Beep: High
- Good Scan Vibrate: Disable
- Bad Scan Beep: Med
- Bad Scan Vibrate: Enable. When a bad beep is received the device will vibrate in addition to the Bad Beep sound.
-
Inventory Center
- Allow Count Change: Enable
- Show Product Description: Enable
- Alternate Row Color: Enable
- Auto-Navigate to Scans: Enable
- Confirm Scanned Data Uploads: Disable
-
Support
- Extended Logging: Disable
Desktop Setup
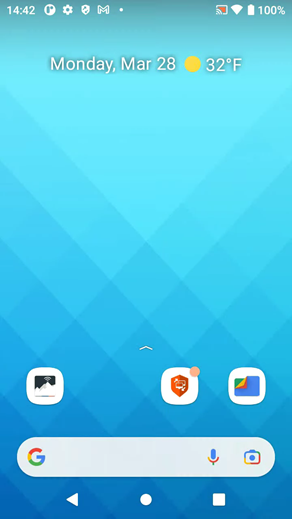
- The AscendScan icon should be in the lower left of the display.
- The Files icon in the lower right.
- The BeyondTrust Support app icon just left of the Files icon.
- Remove (but do not uninstall, if prompted) all the other icons from the desktop.
You're now ready to install BeyondTrust!
BeyondTrust is a remote tool Ascend Support can use to see what you see on your device. This helps immensely with troubleshooting.
Only purchase scanners from your trusted Ascend Business Development Team.
If the EA660 scanner is purchased from a 3rd party supplier, there's the possibility that the scanner will not function correctly. In addition, there would be an additional charge for the AscendScan application.
Please contact the Ascend Business Development for more information (sales@ascendrms.com).
KB26-01